5 must hand tool to start a welding gun
today we discuss 5 must hand tool to start a welding gun. In order to properly weld, you need to have the right tools. One of those tools is a welding gun. A welding gun helps you create an arc that produces heat, allowing you to melt and join two pieces of metal together
types of welding guns:
There are two main types of welding guns: MIG (metal inert gas) and TIG (tungsten inert gas). MIG welding is the most common type of welding, and it’s what we’ll be focusing on in this blog post
MIG welding is a semi-automatic process that uses a wire feeder to deliver filler metal to the weld joint. The operator controls the trigger on the welding gun, which starts and stops the flow of filler metal. Gas is also used in MIG welding, and it helps to protect the weld joint from contamination
how to use a welding gun?
Now that we’ve gone over the basics of MIG welding, let’s take a look at how to use a welding gun
First, you need to make sure that your workspace is clean and well-ventilated. Welding produces fumes that can be harmful if inhaled, so it’s important to work in an area with plenty of fresh air
Next, you’ll need to set up your equipment. This includes your power source, wire feeder, ground clamp, and hose. Once everything is hooked up, you can start preparing your materials for welding
If you’re using new metal, there’s no need to clean it. However, if you’re working with old metal or recycled materials, you’ll need to clean them before beginning the welding process. This removes contaminants that could weaken the weld joint
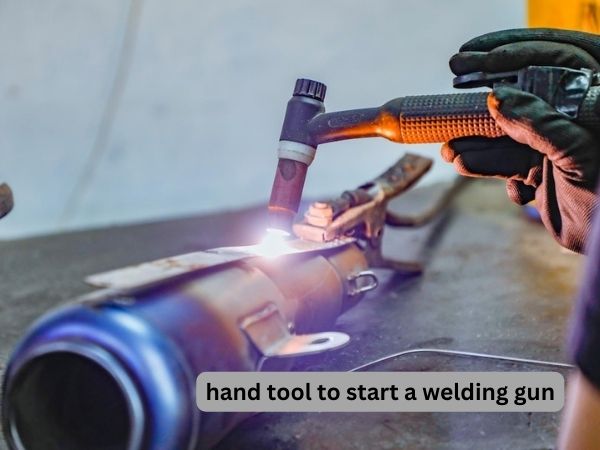
Once your materials are prepared, you can begin welding! Start by gripping the torch in your non-dominant hand and holding it at a 10 to 15-degree angle above the surface of the metal. Then, squeeze the trigger and bring the torch down to where you want to start the weld joint. Move the torch along the length of the joint as you continue squeezing the trigger.
When you get to the end of the weld joint, release the trigger and lift the torch away from the surface of the metal. Let go of the grip with your non-dominant hand and quickly move it up above where you started welding; this helps cool down the area so that you don’t damage your materials
Must hand tool to start a welding gun:
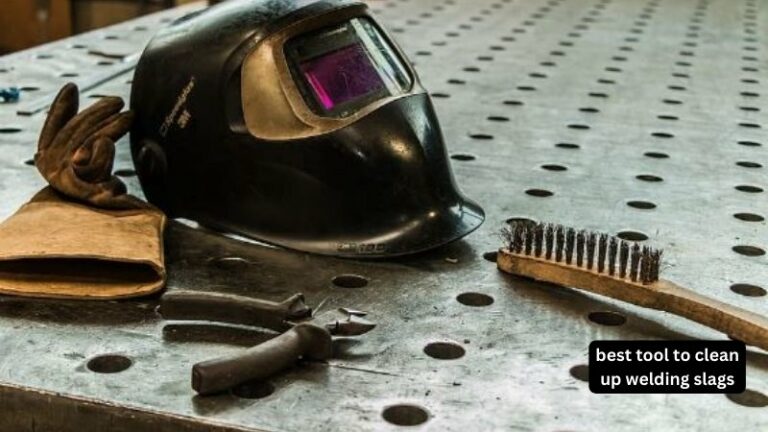
When you’re ready to start welding, you’ll need to have a few tools on hand. In addition to the welding gun, you’ll need a chipping hammer, wire brush, welding gloves, safety glasses, and a welding mask. These items will help you to stay safe while you’re working and will also help you to get the best results possible.
With all of your tools on hand, you’re ready to start welding! Just remember to take your time, be careful, and always follow safety precautions. With a little practice, you’ll be a pro in no time.
chipping hammer:
Chipping hammers are effectively used to clean metal surfaces prior to welding, breaking away slag and spatter from previous welds so that the fresh weld can establish a good bond between the two pieces of metal.
Hammers vary in size and weight, from 2 lb (0.91 kg) English point chipping hammers which are used for delicate work, up to 16 lb (7.3 kg) wide chisel-faced bevel edge chipping hammers which are used for more demanding work such as breaking concrete.
The handles on these tools also vary in length; shorter handles provide greater control while longer handles allow for more leverage.
Chipping hammers can also be useful for starting a welding gun because they can help break away slag that has built up on the tip of the gun. This can help improve the quality of the weld by ensuring that the metal being welded is clean.
When using a chipping hammer, it is important to wear gloves and safety glasses to protect yourself from flying debris. In addition, it is advisable to work in a well-ventilated area to avoid inhaling fumes from the metal.
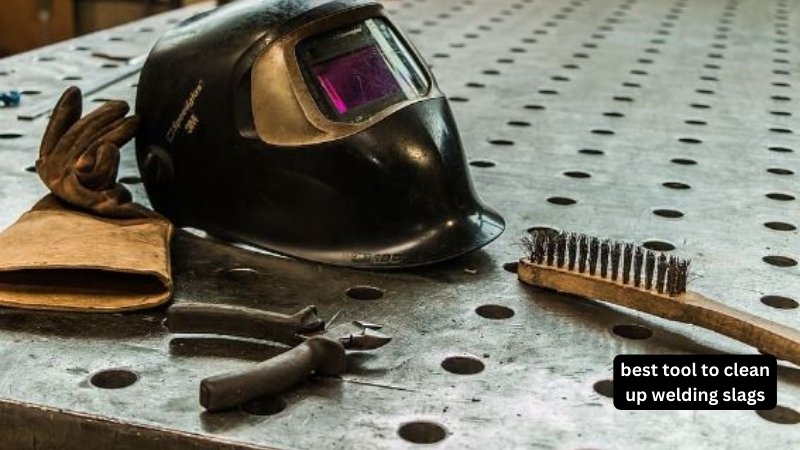
wire brush:
The wire brush is used to clean the contact surfaces on the welding gun. this is also Used to clean the welding area before starting and after finishing. This is important to ensure a good electrical connection and to help prevent arc initiation problems.
welding gloves:
Welding gloves are worn to protect your hands from sparks and heat while welding. The gloves keep your hands safe and also help you grip the welding gun securely.
safety glasses:
safety glasses are important when starting a welding gun. they protect your eyes from the bright flashes of light that are created when the gun is turned on. Second, they help to keep any metal particles or other debris from flying into your eyes. Finally, they provide a barrier between your face and the hot welding torch, which can prevent burns or other injuries.
So while you may not think that safety glasses are necessary when you first start welding, they can actually be very helpful in protecting you from potential risks. It is always better to be safe than sorry, so make sure to put on a pair of safety glasses before starting any welding project!
welding mask:
Welding masks are used to protect the welder’s eyes and face from sparks, ultraviolet radiation, and infrared radiation. They also protect the welder from fumes and other debris that may be generated by the welding process.
Conclusion
Welding is a great way to join two pieces of metal together, but it’s important to have the right tools for the job. A welding gun is one of those essential tools, and we hope this blog post has helped you understand how to use one! Remember to always work in a well-ventilated area and take breaks often to avoid inhaling harmful fumes. If you’re new to welding or still have some questions about using a gun effectively, we suggest doing more research or taking a class so that you can get some hands-on experience under your belt!