How To Weld Metal Seams
Welding is an essential skill for anyone working with metal. Whether you’re a professional welder or a DIY enthusiast, knowing how to weld metal seams can open up a world of possibilities for creating and repairing various structures. From fabricating sculptures to constructing sturdy metal frames, welding allows you to join metal pieces together with precision and strength. In this guide, we will delve into the basics of welding metal seams, providing you with step-by-step instructions and expert tips to help you master this valuable technique. So grab your welding helmet, put on your safety gear, and let’s dive into the fascinating world of welding!
Imagine the satisfaction of effortlessly fusing two metal pieces into one seamless unit. Welding metal seams is not only a practical skill, but it’s also an art form that requires finesse and attention to detail. Whether you’re a novice or have some welding experience, this guide will equip you with the knowledge and techniques to tackle any welding project with confidence. We will explore the different types of welding processes, the necessary equipment and safety precautions, as well as the proper techniques for achieving strong and aesthetically pleasing welds. So, if you’re ready to take your metalworking skills to the next level, let’s dive into the world of welding and unlock the endless possibilities it offers!
How to Weld Metal Seams:
- Prepare the metal surfaces by cleaning and removing any rust or contaminants.
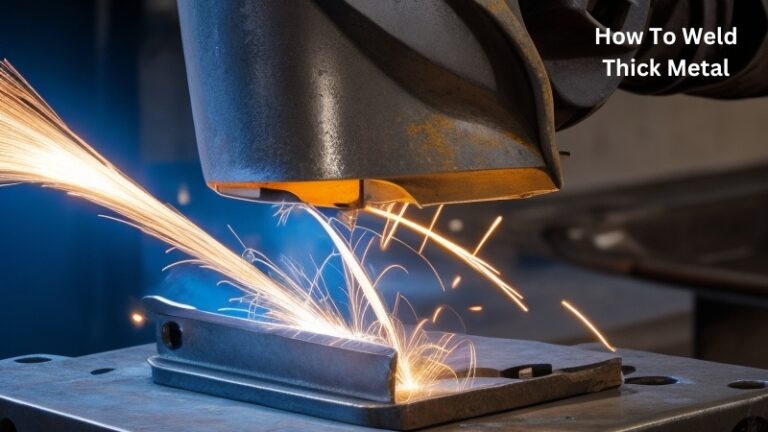
- Choose the appropriate welding method based on the type of metal and thickness.
- Set up the welding equipment, including the power source, electrode, and shielding gas.
- Position the metal pieces to be welded, ensuring a tight fit and proper alignment.
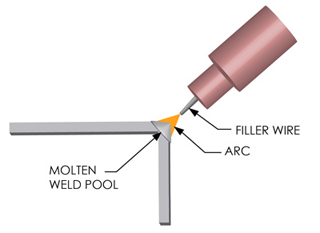
- Start the welding process by creating an arc or heat source between the metal surfaces.
- Move the welding torch or electrode along the seam, gradually melting the metal and creating a strong bond.
- Continue welding until the entire seam is filled and fused together.
- Allow the welded metal to cool down slowly to prevent stress and distortion.
- Clean the welded area and inspect for any defects or imperfections.
How to Weld Metal Seams: A Step-by-Step Guide
Welding metal seams is a crucial skill for any aspiring metalworker or DIY enthusiast. Whether you are repairing a broken metal object or creating a new piece from scratch, knowing how to weld seams properly is essential for achieving strong and durable results. In this guide, we will walk you through the step-by-step process of welding metal seams, providing you with the knowledge and techniques you need to successfully complete your welding projects.
Step 1: Prepare the Metal Surfaces
Before you begin welding, it is important to properly prepare the metal surfaces that you will be joining. Start by cleaning the seams using a wire brush or grinder to remove any rust, dirt, or paint. This will ensure a clean surface for the weld to adhere to. Additionally, make sure the metal edges are properly aligned and fit together tightly, as any gaps or misalignments can weaken the weld.
Once the surfaces are clean and aligned, use a degreaser or solvent to remove any oils or contaminants that may interfere with the welding process. Wipe down the surfaces with a clean cloth to ensure they are completely dry before proceeding.
Step 2: Set Up Your Welding Equipment
Proper setup of your welding equipment is crucial for achieving quality welds. Start by selecting the appropriate welding method for your project. Common options include arc welding, MIG welding, or TIG welding, each with its own advantages and limitations.
Next, make sure you have the necessary safety equipment, such as a welding helmet, gloves, and protective clothing, to protect yourself from sparks, UV rays, and heat. Set up your welding machine according to the manufacturer’s instructions, ensuring the correct settings for your chosen welding method and the thickness of the metal you are working with.
Step 3: Welding Techniques
When it comes to welding metal seams, there are several techniques you can employ. The choice of technique depends on the type of weld you want to create and the equipment at your disposal. Here are a few commonly used techniques:
1. Butt Joint: This technique is used when joining two metal pieces along their edges. The edges are aligned and welded together in a straight line.
2. Lap Joint: In this technique, one piece of metal overlaps the other, creating a joint where the two pieces are welded together.
3. T-Joint: This technique is commonly used to join two metal pieces that are perpendicular to each other, forming a T shape. The two pieces are welded at the intersection.
Regardless of the technique you choose, it is important to maintain a steady hand and a consistent welding speed. Move the welding torch or electrode in a controlled manner, following the joint line, and ensure that the weld penetrates both metal surfaces evenly.
Step 4: Post-Welding Inspection and Finishing
After completing the weld, it is essential to inspect the joint for any defects or imperfections. Use a wire brush or grinder to remove any slag, spatter, or excess weld material. Inspect the weld visually and, if necessary, perform non-destructive testing, such as dye penetrant or ultrasonic testing, to ensure the integrity of the weld.
Finally, if desired, you can finish the welded metal seam by grinding down any rough edges or applying a protective coating, such as paint or rust-resistant sealant, to enhance its appearance and durability.
Step 5: Practice and Safety
Welding is a skill that requires practice to master. Continuously honing your technique and familiarizing yourself with different welding methods and materials will help you improve your welding skills over time. Always prioritize safety by wearing appropriate protective gear, working in a well-ventilated area, and following safety guidelines provided by your welding equipment manufacturer.
By following these steps and practicing regularly, you will become more proficient in welding metal seams, allowing you to tackle a wide range of welding projects with confidence and precision.
Frequently Asked Questions
Welding metal seams can be a complex process, but with the right knowledge and techniques, it can be done effectively. Here are some commonly asked questions about welding metal seams and their answers:
1. What is the best type of welding for metal seams?
There are several types of welding that can be used for metal seams, but one of the most commonly used methods is MIG (Metal Inert Gas) welding. MIG welding uses a wire electrode to create an electric arc between the metal being welded and the welding gun. The electric arc melts the wire and fuses it with the base metal, creating a strong and durable weld.
MIG welding is preferred for metal seams because it is relatively easy to learn and provides good control over the welding process. It is also versatile and can be used on a wide range of metals, including mild steel, stainless steel, and aluminum.
2. What safety precautions should I take when welding metal seams?
Welding can be hazardous if proper safety precautions are not taken. Here are some important safety measures to follow when welding metal seams:
First, always wear protective gear, including a welding helmet with a darkened shield, welding gloves, and flame-resistant clothing. This will protect your eyes, hands, and body from sparks, UV radiation, and heat.
Second, make sure you are working in a well-ventilated area or use exhaust fans to remove fumes and gases produced during welding. Fumes can be harmful if inhaled, so wearing a respirator is also recommended.
3. How do I prepare metal seams for welding?
Proper preparation is crucial for achieving a strong and clean weld. Before welding metal seams, start by cleaning the surfaces to be welded. Remove any dirt, rust, or paint using a wire brush or grinder. This will ensure good contact between the metal pieces and the welding electrode, resulting in a solid weld.
Next, bevel the edges of the metal seams to create a V-shaped groove. This allows for better penetration of the weld and increases the strength of the joint. Use an angle grinder or a specialized beveling tool to achieve the desired angle.
4. What type of welding electrode should I use for metal seams?
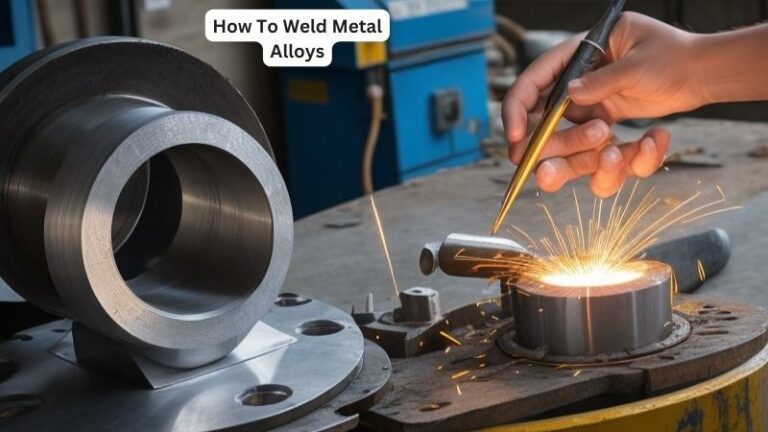
The choice of welding electrode depends on the type of metal being welded. For mild steel, a general-purpose electrode such as E6013 or E7018 is commonly used. These electrodes provide good weldability and produce strong, clean welds.
For stainless steel, electrodes such as E308L or E316L are recommended. These electrodes are specifically designed for welding stainless steel and provide excellent corrosion resistance.
5. How can I prevent distortion when welding metal seams?
Distortion is a common issue when welding metal seams, especially if the metal pieces are thin or have uneven heat distribution. To minimize distortion, follow these tips:
First, use tack welds to hold the metal pieces in place before making a continuous weld. Tack welds are small, temporary welds that help prevent movement and misalignment during welding.
Second, use a technique called backstepping, where you weld in short segments and move backward. This helps distribute heat evenly and reduces the risk of warping or buckling. Finally, allow the metal to cool slowly after welding to minimize stress and distortion.

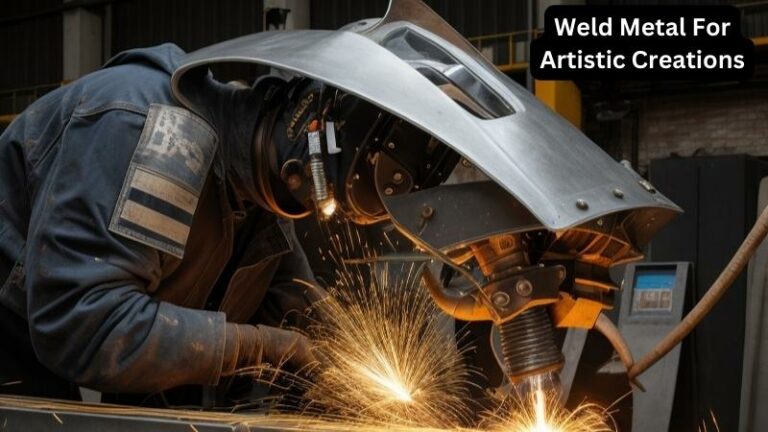
In conclusion, learning how to weld metal seams is a valuable skill that can open up a world of opportunities in various industries. Whether you are interested in automotive repair, construction, or even artistic metalwork, mastering this technique will allow you to bring your visions to life. By following the proper safety precautions, understanding the different types of welding methods, and practicing your technique, you can confidently join metal seams with precision and strength.
Remember, welding is both an art and a science. It requires patience, attention to detail, and a willingness to learn from mistakes. As you embark on your welding journey, don’t be discouraged by initial challenges. With each weld, you will gain more experience and confidence, honing your skills and expanding your capabilities. So, grab your welding helmet and embrace the sparks – the world of metalworking awaits your creativity and expertise. Happy welding!