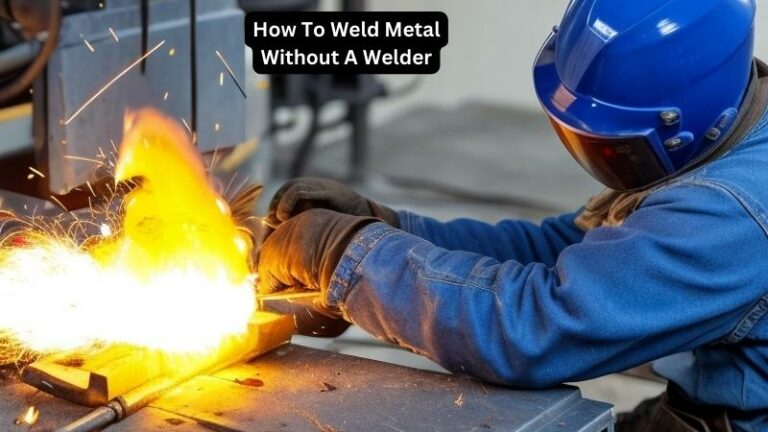
How To Weld Metal With A MIG Welder
Are you fascinated by the art of welding? Do you feel a sense of awe when you see two pieces of metal meld together seamlessly? If so, then you’ve come to the right place. In this guide, we will delve into the world of MIG welding, a popular technique used to join metal pieces together. Whether you’re a seasoned welder looking to brush up on your skills or a complete beginner eager to learn the basics, this comprehensive guide will equip you with the knowledge and techniques needed to weld metal with a MIG welder like a pro.
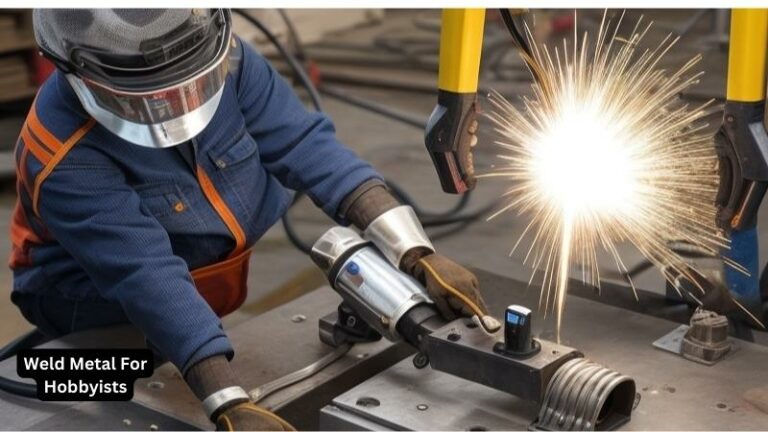
MIG welding, also known as Gas Metal Arc Welding (GMAW), is a versatile and relatively easy-to-learn welding process that uses a continuously feeding wire electrode to create an electric arc between the metal being welded and the welding gun. This electric arc produces heat, which in turn melts the metal and allows it to fuse together. With its ability to weld a wide range of metals, including carbon steel, stainless steel, and aluminum, MIG welding has become a preferred method for many professionals and hobbyists alike. So, whether you’re looking to repair a broken metal structure or explore your creative side through metal art, mastering the art of MIG welding will open up a world of possibilities.
- Prepare your workspace by cleaning the metal surfaces and ensuring proper ventilation.
- Put on safety gear, including welding mask, gloves, and protective clothing.
- Set up your MIG welder according to the manufacturer’s instructions.
- Position the metal pieces to be welded and secure them in place using clamps or magnets.
- Hold the MIG welder torch at a 10-15 degree angle and start welding by pressing the trigger.
- Move the torch in a steady motion along the joint, maintaining a consistent distance from the metal.
- Continue welding until the joint is fully bonded.
- Allow the welded metal to cool down before handling.

How to Weld Metal with a MIG Welder
Welding metal with a MIG (Metal Inert Gas) welder is a common and versatile method used in various industries. It allows for efficient and precise joining of metal pieces, whether for repairs or fabrication. In this article, we will guide you through the step-by-step process of using a MIG welder to achieve strong and durable welds.
Step 1: Prepare Your Work Area
Before starting any welding project, it is crucial to ensure your work area is well-prepared. Begin by clearing the space of any flammable materials, such as paper or chemicals, to minimize the risk of fire. Make sure you have good ventilation to remove harmful welding fumes. Additionally, have a fire extinguisher nearby and wear appropriate protective gear, including welding gloves, a welding helmet, and a welding apron.
Next, clean the metal surfaces you plan to weld. Use a wire brush or grinder to remove any rust, paint, or other contaminants. Properly cleaned metal surfaces ensure better weld quality and reduce the chances of porosity or weak joints. Lastly, secure the metal pieces to be welded in the desired position using clamps or a welding fixture to ensure stability during the welding process.
Step 2: Set Up the MIG Welder
Now that your work area is ready, it’s time to set up the MIG welder. Start by selecting the appropriate wire and shielding gas for the metal you are welding. Consult the manufacturer’s recommendations or a welding chart for the correct settings. Load the wire spool onto the welder and thread the wire through the welding gun’s liner. Ensure the wire feed tension is properly adjusted to prevent feeding issues during welding.
Next, install the appropriate contact tip size for the wire diameter you are using. The contact tip is responsible for transferring the electrical current to the wire. It should fit snugly and be securely tightened. Connect the welding gun to the welder’s positive terminal and attach the ground clamp to the workpiece, ensuring a solid electrical connection. Finally, adjust the voltage and wire feed speed settings on the welder according to the material thickness and joint design.
Step 3: Welding Technique
Now that everything is set up, it’s time to start welding. Begin by positioning the welding gun at a slight angle, approximately 15-20 degrees, and maintain a consistent distance between the gun and the workpiece. The recommended distance is usually around ⅜ to ½ inch.
Trigger the welder to start the arc and move the gun steadily along the joint in a controlled motion. The welding technique you use depends on the joint configuration and the type of weld you want to create. Common techniques include the push technique, where the gun is pushed away from the weld pool, and the drag technique, where the gun is dragged towards the weld pool.
Step 4: Post-Welding Cleanup
After completing the welds, allow the metal to cool down naturally. Avoid touching the welded area until it has cooled sufficiently. Once cooled, inspect the welds for any defects or inconsistencies. Use a wire brush or grinder to clean off any welding spatter or slag that may have formed during the welding process.
If necessary, you can grind down the welds to achieve a smoother finish or to remove any excess material. However, be cautious not to compromise the structural integrity of the weld. Finally, clean the work area, store the equipment properly, and dispose of any welding debris or waste materials responsibly.
Step 5: Practice and Continuous Improvement
Remember, welding is a skill that improves with practice. The more you weld, the better you’ll become at controlling the MIG welder and producing high-quality welds. Seek guidance from experienced welders, take welding courses, and never stop learning.
Regularly inspect and maintain your MIG welder to ensure it remains in optimal working condition. Replace worn-out parts, keep the machine clean, and follow the manufacturer’s instructions for proper maintenance.
Frequently Asked Questions
Here are some common questions about how to weld metal with a MIG welder:
Question 1: What is a MIG welder and how does it work?
A MIG welder, short for Metal Inert Gas welder, is a type of welding machine that uses a continuous wire electrode to create an electric arc for welding. The electrode is fed through a welding gun and is melted to join the workpieces together. A shielding gas, such as argon or a mixture of argon and carbon dioxide, is also used to protect the weld pool from contaminants in the air.
MIG welding is a versatile process that can be used to weld various types of metals, including steel, stainless steel, and aluminum. It is commonly used in automotive, construction, and manufacturing industries.
Question 2: What safety precautions should I take when using a MIG welder?
When using a MIG welder, it is important to prioritize safety. Here are some precautions to follow:
1. Wear appropriate safety gear, including a welding helmet, gloves, and protective clothing to shield yourself from sparks and UV radiation.
2. Ensure good ventilation in your work area to prevent the accumulation of harmful fumes.
3. Keep a fire extinguisher nearby in case of emergencies.
4. Inspect your welding equipment regularly and make sure it is in good working condition.
By following these safety measures, you can minimize the risk of accidents and protect yourself while welding.
Question 3: What are some tips for preparing metal for MIG welding?
Proper preparation of the metal surface is essential for achieving strong and clean welds. Here are some tips:
1. Clean the metal thoroughly to remove any dirt, rust, or paint. Use a wire brush or sandpaper to achieve a clean surface.
2. Bevel the edges of the metal if necessary. This helps create a stronger weld joint.
3. Ensure that the workpieces are properly aligned and clamped together to prevent movement during welding.
By taking the time to prepare the metal correctly, you can ensure better weld quality and reduce the chances of defects.
Question 4: What are some common troubleshooting issues in MIG welding?
MIG welding can sometimes encounter issues that affect the quality of the weld. Here are a few common problems and their solutions:
1. Excessive spatter: This can occur due to high welding current or improper shielding gas flow. Adjust the settings and ensure proper gas flow to reduce spatter.
2. Porosity in the weld: Porosity is often caused by contamination on the metal surface or inadequate gas coverage. Clean the metal thoroughly and ensure proper shielding gas flow.
3. Burn-through or warping: These issues can arise from excessive heat input or poor welding technique. Adjust the welding parameters and practice proper technique to avoid such problems.
By troubleshooting these common issues, you can improve the overall quality and integrity of your MIG welds.
Question 5: What are some best practices for MIG welding?
To achieve the best results with MIG welding, consider the following practices:
1. Choose the right welding wire and shielding gas for the specific metal you are welding.
2. Maintain a consistent welding technique and travel speed to ensure even penetration and bead appearance.
3. Practice good welder control to avoid excessive heat input, which can lead to distortion or burn-through.
4. Clean the welding gun regularly to remove any spatter or debris that can affect the weld quality.
By following these best practices and continuously improving your skills, you can achieve high-quality welds with a MIG welder.
However, it is important to remember that welding is not without its risks. Safety should always be the top priority when operating a MIG welder. Wearing appropriate protective gear, ensuring proper ventilation, and following established safety guidelines are essential to prevent accidents and protect oneself from potential hazards. By adhering to these precautions and continuously improving one’s skills, individuals can confidently wield the power of a MIG welder, creating impressive metalwork that stands the test of time.