How To Weld Brass
Today we discuss How To Weld Brass. Brass, with its distinct golden hue and exceptional durability, has been a staple material in various industries for centuries. From intricate sculptures to robust plumbing fixtures, this alloy of copper and zinc has proven its versatility time and time again.
However, working with brass requires a specific set of skills and one of the most essential among them is the art of welding. In this guide, we will delve into the techniques, tools, and precautions necessary to master the art of welding brass, ensuring that you can confidently create strong and seamless joints in this remarkable metal.
Welding brass is an intricate process that demands a deep understanding of both the material itself and the welding techniques involved. This guide aims to equip you with the knowledge and skills needed to navigate this fascinating craft.
Whether you are a seasoned welder looking to expand your expertise or a novice eager to embark on a brass-welding adventure, you will find valuable insights and practical tips to help you achieve exceptional results. So, don your protective gear, ignite your torch, and let’s explore the world of welding brass together, one molten bead at a time.
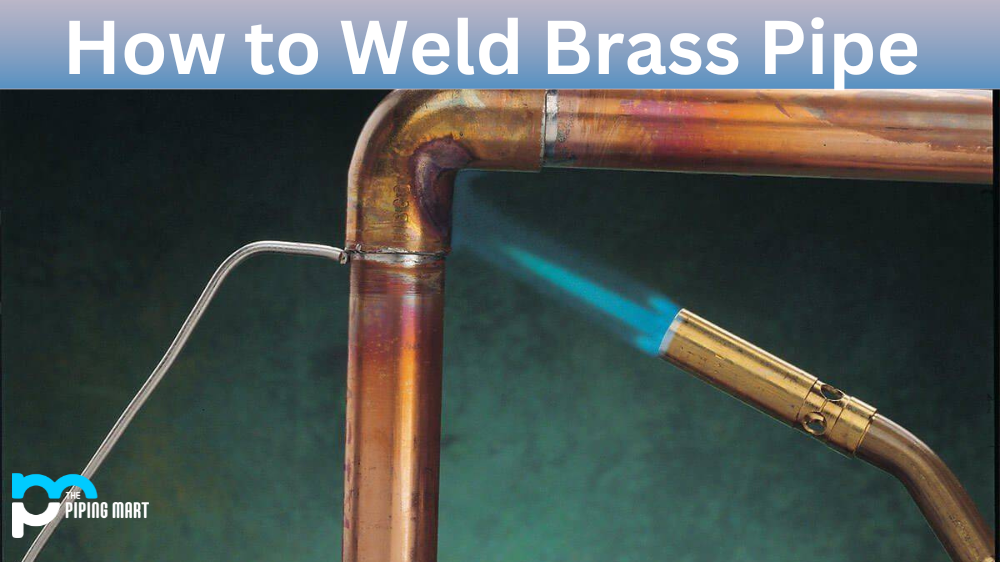
Welding brass requires careful preparation and the right technique. Here’s a step-by-step guide on how to weld brass:
- Make sure you have the necessary safety equipment, including gloves and goggles.
- Clean the brass surfaces you want to weld using a wire brush or sandpaper to remove any dirt or oxidation.
- Apply flux to the cleaned surfaces to prevent oxidation during the welding process.
- Use a propane or oxyacetylene torch to heat the brass pieces until they reach the melting point.
- Add the brass welding rod or filler metal to the joint, ensuring it melts and fuses with the base metal.
- Allow the weld to cool down slowly to prevent cracking or distortion.

Gather the necessary tools and materials:
Before you start welding brass, it is essential to gather all the necessary tools and materials. Here’s a list of what you’ll need:
- Brass pieces to be welded
- Brass welding rod
- Flux
- Torch (either oxy-acetylene or propane)
- Safety goggles
- Welding gloves
- Fire extinguisher
Make sure you have a well-ventilated workspace and that you follow all safety precautions while welding.
Once you have gathered all the necessary tools and materials, you are ready to proceed to the next step.
Prepare the brass surfaces:
Properly preparing the brass surfaces is crucial for achieving a strong and clean weld. Follow these steps:
- Start by cleaning the brass pieces to be welded. Remove any dirt, oil, or corrosion using a wire brush or sandpaper. A clean surface will ensure better adhesion between the brass and the welding rod.
- Apply flux to the areas to be joined. Flux helps prevent oxidation and promotes the flow of molten brass. Use a brush or a flux pen to apply a thin, even layer of flux.
- Position the brass pieces to be welded together. Make sure they are aligned correctly and secure them in place using clamps or a vice.
With the brass surfaces properly prepared, you can now move on to the actual welding process.
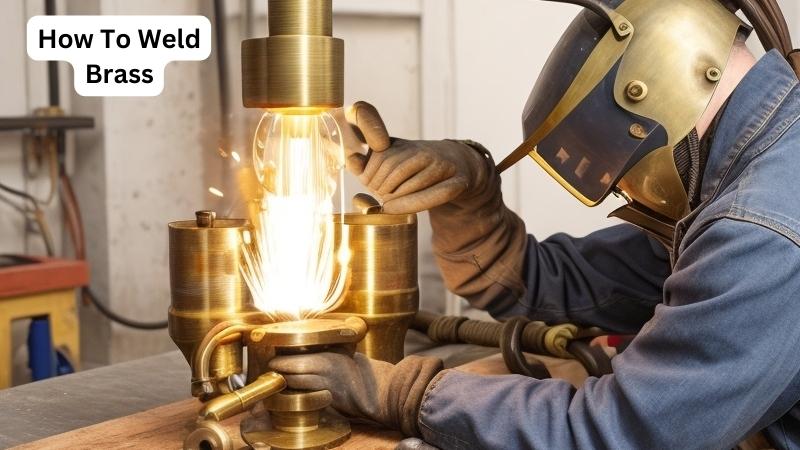
Welding the brass:
Follow these steps to weld the brass pieces together:
- Put on your safety goggles and welding gloves to protect yourself from sparks and heat.
- Light up your torch, adjusting the flame to a medium level. The ideal flame should be blue with a small, well-defined inner cone.
- Hold the torch at a 45-degree angle to the brass joint and begin heating the area to be welded. Move the flame in a circular motion to distribute the heat evenly.
- Once the brass reaches the correct temperature (around 1,650°F or 900°C), melt the welding rod directly into the joint. The molten brass should flow smoothly and fill the gap between the brass pieces.
- Continue moving the torch along the joint, adding more welding rod as needed, until the entire joint is filled.
After completing the weld, allow the brass to cool naturally. Avoid quenching it in water, as rapid cooling can cause cracks or distortion. Once cooled, you can remove any excess flux using a wire brush or a mild cleaning solution.
Faqs for How To Weld Brass:
Answer: The best welding process for brass is typically brazing. Brazing involves using a filler material, such as a brass alloy, to join the pieces of brass together. This process utilizes a lower temperature compared to other welding methods, which helps prevent distortion or damage to the brass. Brazing also ensures a strong bond between the brass pieces.
When brazing brass, it is important to clean the surfaces thoroughly and apply flux to promote proper adhesion. The brass pieces should be heated evenly to the recommended temperature for the filler material to melt and flow between the joints, creating a secure weld.
Answer:
When welding brass, it is important to wear appropriate personal protective equipment (PPE) to ensure safety. This includes protective eyewear, gloves, and a welding helmet to shield against sparks and UV radiation.
Additionally, ensure good ventilation in the work area to prevent the inhalation of fumes.
It is also crucial to have a fire extinguisher nearby in case of any accidental fires. Brass welding can produce hot sparks and flames, so having a fire safety plan in place is essential. Always follow proper safety procedures and guidelines when working with welding equipment and materials.
Answer:
While it is technically possible to use a regular welding machine, such as a MIG or TIG welder, for brass welding, it is not the most suitable option. Brass has a low melting point, and regular welding machines generate high heat that may cause the brass to melt or deform.
As mentioned earlier, brazing is the recommended welding process for brass. Brazing equipment, like a torch or a furnace, allows for better control of temperature and prevents overheating. It is best to use specialized brazing equipment specifically designed for brass welding to achieve optimal results.
Answer:
When brazing brass, it is important to use a filler material that is compatible with brass and has a lower melting point than the base metal. A common choice for brass welding is a brass alloy filler rod, which is composed of a blend of copper and zinc.
Ensure that the filler material is clean and free from any contaminants. Proper cleaning and flux application on the brass surfaces will help promote a strong bond with the filler material. It is advisable to consult with experts or refer to welding guidelines to determine the most suitable filler material for your specific brass welding project.
Answer:
Proper surface preparation is crucial for successful brass welding. Before welding, it is important to clean the brass surfaces thoroughly to remove any dirt, grease, or oxide layers. This can be done using a degreasing agent or by mechanically cleaning the surfaces with a wire brush or sandpaper.
After cleaning, it is recommended to apply flux to the brass surfaces. Flux helps remove any remaining oxides and promotes the flow of the filler material during the brazing process. Applying flux evenly and in the correct amount is essential for achieving a high-quality weld. Once the surfaces are cleaned and flux is applied, you can proceed with heating and joining the brass pieces together.
Source: thepipingmart.com
Final thoughts:
Learning how to weld brass opens up a world of possibilities for metalworking enthusiasts. With practice and patience, you can master this technique and create beautiful brass structures or repair valuable brass items. Always remember to prioritize safety, wear appropriate protective gear, and follow proper welding procedures. Now that you have learned the step-by-step process of welding brass, it’s time to put your skills to the test and embark on your next brass welding project!