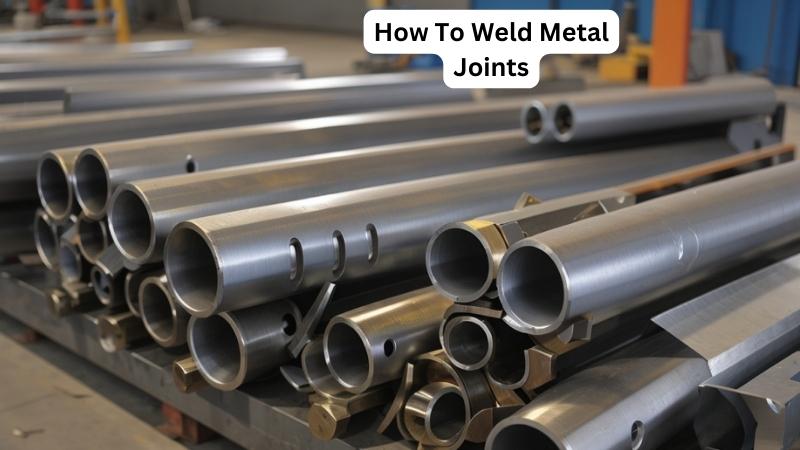
How To Weld Metal Joints
Today we discuss How To Weld Metal Joints. Welding may seem like a daunting task, but with the right knowledge and practice, anyone can master this essential skill. There’s an undeniable satisfaction in fusing metal together, watching as two separate pieces become one.
However, welding is more than just a creative outlet; it is a trade that is in high demand across industries. Whether you’re interested in pursuing a career in construction, manufacturing, or even art, understanding how to weld metal joints can open up a world of possibilities.
So, grab your safety gear, fire up the welding machine, and let’s begin our journey into the captivating world of welding, where sparks ignite creativity and metal is transformed into something greater than the sum of its parts.

How To Weld Metal Joints:
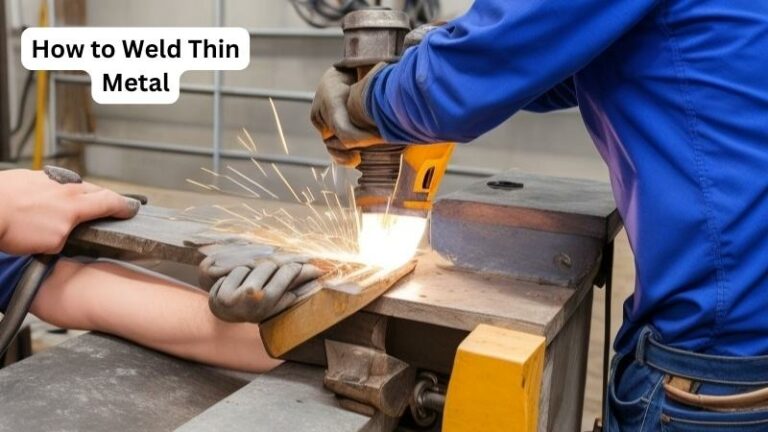
Step 1: Safety Precautions
Before you begin welding, it is essential to prioritize safety. Welding involves high temperatures and potentially hazardous fumes. Here are some safety precautions to follow:
- Always wear protective clothing, including a welding helmet, gloves, and a fire-resistant jacket. These items will protect you from sparks, heat, and UV radiation.
- Ensure that your work area is well-ventilated to minimize exposure to welding fumes. If necessary, use a fume extraction system or work outdoors.
- Keep a fire extinguisher nearby and be aware of any flammable materials in your workspace. Welding can cause sparks that may ignite nearby objects.
- Inspect your welding equipment, including the welding machine, cables, and electrodes, before starting. Make sure there are no damages or defects that could compromise your safety.
- Secure your workpieces using clamps or fixtures to ensure stability during the welding process.
- Inform others in your vicinity about your welding activities and restrict access to the welding area to prevent accidents.
Step 2: Prepare the Metal Joints
Proper preparation of the metal joints is crucial for a successful weld. Here’s what you need to do:
- Clean the metal surfaces that will be welded using a wire brush or grinder. Remove any rust, paint, or debris that could hinder the welding process.
- Ensure that the metal pieces are properly aligned and tightly secured. This will prevent any gaps or misalignment during the welding process.
- If necessary, use a metal file to create beveled edges on the metal pieces. Beveled edges allow for better penetration of the weld.
- Determine the appropriate welding technique for your metal joints. Common welding techniques include MIG (Metal Inert Gas), TIG (Tungsten Inert Gas), and Stick welding. Each technique has its advantages and is suitable for different types of metals and joints.
- Select the appropriate welding electrode or wire for your welding process. Different electrodes have varying compositions and are designed for specific applications.
- Set up your welding machine according to the specifications recommended for the metal thickness and welding technique you are using.
Step 3: Weld the Metal Joints
Now that you have prepared the metal joints, it’s time to start welding. Follow these steps:
- Position yourself comfortably and securely in front of the metal joints. Maintain a stable stance and ensure that your body is not in the direct line of the welding arc.
- Hold the welding torch or electrode holder at the correct angle and distance from the metal joint. The angle and distance depend on the welding technique and electrode you are using. Refer to the manufacturer’s guidelines for specific recommendations.
- Start the welding process by initiating the arc. This can be done by striking the electrode against the metal or pressing the trigger on a MIG or TIG welding torch.
- Move the welding torch or electrode holder steadily along the joint, maintaining a consistent speed and distance. The motion should be smooth and continuous to ensure a uniform weld bead.
- Pay attention to the appearance of the weld pool and the sound of the welding process. Adjust your technique as necessary to achieve the desired weld quality.
- Once you have completed the welding, allow the metal joints to cool gradually in a safe and controlled environment. Avoid exposing hot welds to water or excessive airflow, as this can cause cracking or distortion.
faqs for How To Weld Metal Joints:
Welding is a process of joining two or more metal pieces together by melting the base metals and adding a filler material to create a strong bond. It is commonly used in various industries such as construction, automotive, and manufacturing.
There are different welding techniques available, including MIG (Metal Inert Gas), TIG (Tungsten Inert Gas), and stick welding. Each technique has its advantages and is suitable for different applications.
Prior to welding, it is important to follow these safety precautions:
1. Wear appropriate protective clothing, including a welding helmet, gloves, and flame-resistant clothing.
2. Ensure proper ventilation in the welding area to prevent the accumulation of harmful fumes and gases.
3. Clear the work area from any flammable materials or substances that may ignite during the welding process.
4. Inspect and maintain welding equipment regularly to ensure safe operation.
The choice of welding technique depends on various factors, including the type of metal, joint design, and the desired strength of the weld.
MIG welding is commonly used for metal joints in applications that require high productivity and speed. It is suitable for welding materials such as steel, stainless steel, and aluminum. TIG welding, on the other hand, offers greater control and precision, making it ideal for thin or delicate metal joints.
Ultimately, the best welding technique for metal joints will depend on your specific project requirements.
The key steps in welding metal joints are as follows:
1. Prepare the metal surfaces by cleaning them thoroughly to remove any dirt, rust, or paint. This ensures proper adhesion and a strong weld.
2. Set up the welding equipment, including selecting the appropriate welding technique, adjusting the power settings, and preparing the filler material.
3. Position the metal pieces in the desired joint configuration, ensuring proper alignment and fit-up.
4. Start the welding process by striking an arc or igniting the welding torch, depending on the technique used.
5. Control the welding speed, heat input, and filler material deposition to achieve a high-quality weld with good penetration and minimal distortion.
6. After completing the weld, inspect it visually and perform any necessary post-weld treatments, such as grinding or cleaning.
1. Use the correct welding technique and parameters for the specific metal and joint design.
2. Ensure proper fit-up and alignment of the metal pieces before welding.
3. Control the welding speed and heat input to avoid overheating or underheating the metal, which can lead to weak welds.
4. Use high-quality filler materials that are compatible with the base metal to achieve a strong and durable weld.
5. Perform visual inspections of the welds and conduct non-destructive testing, if necessary, to detect any defects or discontinuities.

Source: uti.edu
conclusion:
learning how to weld metal joints is a valuable skill that can open up a world of possibilities in various industries. By understanding the principles of welding, practicing proper techniques, and being aware of safety measures, one can confidently join metal pieces together with precision and strength. Whether it is for automotive repairs, construction projects, or artistic creations, the ability to weld metal joints empowers individuals to bring their ideas to life and contribute to the advancement of technology and innovation.