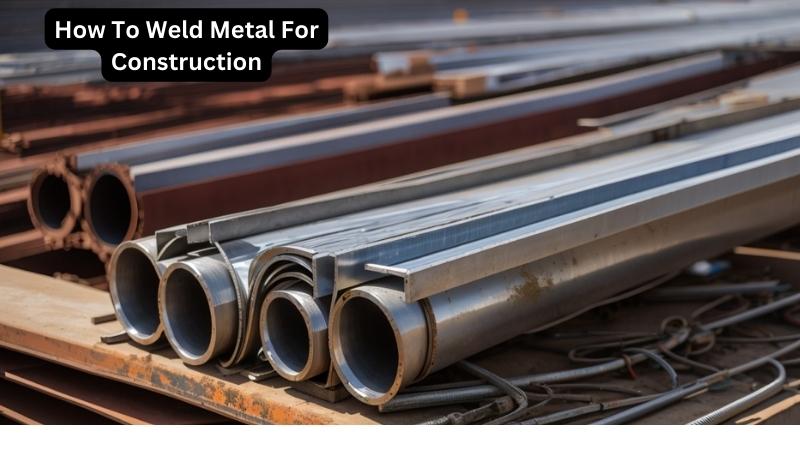
How To Weld Metal For Construction
Today we discuss How To Weld Metal For Construction. Metal welding is a crucial skill in the world of construction, where steel and other metals form the backbone of buildings and infrastructure. Whether you are a seasoned professional or a curious beginner, learning how to weld metal opens up a world of possibilities for creating sturdy and reliable structures.
From joining metal beams to fabricating intricate designs, mastering the art of welding not only enhances your toolkit as a construction professional but also empowers you to bring your creative visions to life.
We will unravel the mysteries of different welding methods, such as MIG, TIG, and stick welding, while also discussing the best practices for preparing metal surfaces, selecting the appropriate filler material, and ensuring structural integrity.
Whether you aim to reinforce existing structures or embark on ambitious construction projects, this guide will equip you with the knowledge and skills needed to weld metal with precision and confidence. So, grab your welding helmet, and let’s dive into the art and science of metal welding for construction.
How to Weld Metal for Construction:
- Prepare the metal surfaces by cleaning and removing any coatings.
- Choose the appropriate welding method based on the metal type and thickness.
- Ensure proper safety gear, including gloves, goggles, and a welding helmet.
- Set up the welding equipment and adjust the settings according to the metal specifications.
- Start welding by creating a tack weld to hold the metals in place.
- Continue welding by moving the torch or electrode along the joint in a steady motion.
- Inspect the weld for quality and make any necessary repairs or adjustments.
- Finish by cleaning the weld and removing any slag or spatter.
10 steps To Weld Metal For Construction:
Step 1: Prepare the Work Area
Before you start welding, it’s crucial to prepare the work area properly. Begin by clearing the space of any debris, flammable materials, or other potential hazards. Ensure that the area is well-ventilated to prevent the accumulation of harmful fumes.
Next, set up your welding equipment. Position your welding machine in a stable location and connect it to a power source. Place your metal pieces on a welding table or workbench, ensuring that they are securely clamped or held in place.
Finally, double-check that you have all the required welding tools, such as electrodes, wire brushes, and a welding torch.
Step 2: Clean the Metal Surfaces
Properly cleaning the metal surfaces is vital for achieving a strong weld. Start by using a wire brush to remove any rust, dirt, or paint from the areas that will be welded. Make sure to clean both sides of the metal pieces thoroughly. If the metal is heavily oxidized, you may need to use a grinder or sandpaper to smoothen the surfaces.
After cleaning, wipe the metal surfaces with a clean cloth or a degreaser to remove any remaining contaminants. This step is crucial as any impurities on the metal can compromise the quality of the weld. Take your time and ensure that the metal surfaces are completely clean and free from any debris.
Step 3: Set Up the Welding Machine
Now that your work area is ready and the metal surfaces are clean, it’s time to set up your welding machine. Begin by selecting the appropriate welding process and adjusting the machine’s settings accordingly.
Consult the welding machine’s manual to determine the correct settings for the type and thickness of the metal you are working with.
Next, install the correct electrode or welding wire for your chosen welding process. Ensure that the electrode or wire is securely attached to the welding torch.
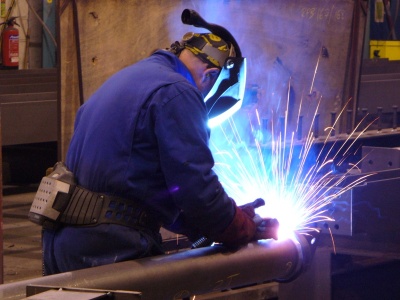
Step 4: Start Welding
With everything set up, you are now ready to start welding. Position the welding torch at a slight angle, pointing it towards the joint or seam you want to weld.
Depress the welding trigger to initiate the arc and begin melting the metal. Move the torch steadily along the joint, maintaining a consistent distance and speed.
As you weld, ensure that the molten metal is penetrating both metal pieces evenly, creating a strong and uniform bond.
Be mindful of the welding machine’s settings, adjusting as needed to maintain a stable arc and achieve the desired weld quality.
Remember to take breaks when necessary to prevent overheating the metal or the welding machine.
Step 5: Inspect and Finish
Once you have completed the welding process, it’s crucial to inspect your welds for any defects or imperfections.
Use a wire brush or a grinder to remove any slag or excess weld material, revealing the clean weld beneath.
Check for any cracks, porosity, or incomplete fusion, as these can weaken the weld and compromise its integrity.
If necessary, you can perform additional passes to reinforce the weld or fill any gaps.
However, ensure that you follow the appropriate welding techniques and maintain the correct machine settings to avoid overheating or damaging the metal.
Finally, once you are satisfied with the weld quality, clean the finished weld with a wire brush and remove any remaining debris.
Step 6: Test the Welds
Before considering the welding process complete, it’s essential to test the strength and integrity of your welds. This is particularly important for construction projects, where the structural integrity of the welds is crucial.
You can use various testing methods, such as visual inspection, liquid penetrant testing, or ultrasonic testing, to ensure that the welds meet the required standards.
If any defects or issues are identified during the testing process, the welding process may need to be repeated or repaired.
It’s essential to address any problems promptly to ensure the structural integrity and safety of the welded construction.
Step 7: Clean and Store the Equipment
After completing the welding process, it’s vital to clean and store your welding equipment properly. Disconnect the welding machine from the power source and allow it to cool down. Clean the welding torch, electrodes, and other tools thoroughly, removing any residual weld material or debris.
Store your welding equipment in a dry and secure location, protecting it from moisture, dust, and potential damage. Regularly inspect and maintain your welding equipment to ensure its optimal performance and longevity.
Step 8: Practice and Improve
Welding is a skill that improves with practice. To become proficient in welding for construction, dedicate time to practice different welding techniques and experiment with various metal thicknesses and types.
Seek additional training or guidance from experienced welders to enhance your skills and knowledge.
Continuously strive to improve your welding abilities, staying up-to-date with the latest welding techniques, technologies, and safety practices.
As you gain more experience, you will become more confident in your welding abilities and be able to tackle more complex construction projects.
Step 9: Follow Safety Guidelines
Throughout the welding process, it’s crucial to prioritize safety. Always wear the appropriate personal protective equipment (PPE), including a welding helmet, gloves, and flame-resistant clothing. Ensure that your work area is well-ventilated and free from any potential fire hazards.
familiarize yourself with the specific safety guidelines and regulations relevant to the welding processes and materials you are using. Adhere to these guidelines at all times to minimize the risk of accidents, injuries, or property damage.
Step 10: Seek Professional Assistance if Needed
While this guide provides a comprehensive overview of how to weld metal for construction, it’s important to recognize your limits. If you encounter complex or specialized welding projects, it may be necessary to seek professional assistance. Trained and experienced welders can provide expert advice and ensure that the welding work meets the required standards and specifications.
Remember, safety and quality should always be your top priorities when it comes to welding for construction. By following the proper procedures, continually improving your skills, and seeking assistance when needed, you will be able to execute welding tasks effectively and contribute to the successful completion of construction projects.
faqs for How To Weld Metal For Construction:
Welding is a process that involves joining two or more pieces of metal together using heat and pressure. It is important in construction because it allows for the creation of strong and durable structures.
Welding is used to connect steel beams, columns, and other structural elements, ensuring they can withstand the forces and loads they will be subjected to.
welding is used to join metal components, such as pipes and plates, which are essential for plumbing, electrical, and mechanical systems in buildings.
By providing a reliable and efficient method of joining metal, welding plays a crucial role in the construction industry, ensuring the integrity and safety of various structures and systems.
There are several types of welding techniques used in construction, including:
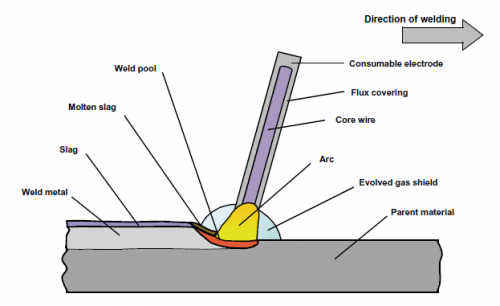
– Shielded Metal Arc Welding (SMAW): Also known as stick welding, this technique uses a consumable electrode coated in flux to create an electric arc that melts the metal and forms the weld.
– Gas Metal Arc Welding (GMAW): Commonly referred to as MIG welding, GMAW employs a wire electrode fed through a welding gun and a shielding gas to protect the weld from atmospheric contamination.
– Flux-Cored Arc Welding (FCAW): Similar to GMAW, FCAW uses a tubular wire electrode filled with flux, eliminating the need for an external shielding gas.
– Gas Tungsten Arc Welding (GTAW): Known as TIG welding, GTAW uses a non-consumable tungsten electrode and a shielding gas to create a high-quality, precise weld.
Welding can be hazardous, so it is important to take certain safety measures when working with metal for construction purposes. Some key safety precautions include:
– Wearing appropriate personal protective equipment (PPE) such as welding helmets, gloves, and clothing to protect against sparks, UV radiation, and molten metal.
– Ensuring proper ventilation in the welding area to remove fumes and gases produced during the welding process.
– Keeping a fire extinguisher nearby to quickly handle any potential fires caused by sparks or heat generated during welding.
– Inspecting and maintaining welding equipment regularly to ensure safe and reliable operation.
– Training and certification in welding techniques to ensure proper handling and understanding of the associated risks.
Welding metal for construction can present some challenges that need to be addressed for successful outcomes. Some common challenges include:
– Ensuring proper joint preparation and fit-up to achieve strong and sound welds. This involves cleaning, beveling, and aligning the metal surfaces to be welded.
– Dealing with distortion and warping caused by the heat generated during welding. This can be mitigated by using proper welding techniques and controlling heat input.
– Managing the potential for weld defects such as cracks, porosity, and lack of fusion. This requires skillful welding techniques, appropriate filler materials, and proper heat control.
– Addressing the risk of weld contamination from moisture, dirt, or oil, which can weaken the weld. Proper cleaning and preparation of the metal surfaces are essential to avoid contamination.
When it comes to welding metal for construction projects, hiring a professional welder offers several benefits:
– Expertise and experience: Professional welders have the knowledge and skills to handle various welding techniques and materials, ensuring high-quality and reliable welds.
– Compliance with regulations: Professional welders are familiar with the industry standards and codes, ensuring that the welding work meets the required specifications and passes inspections.
– Time and cost efficiency: Professional welders work efficiently, reducing the time required for welding tasks and minimizing the risk of errors or rework. This can result in cost savings for the construction project.
– Safety assurance: Professional welders prioritize safety and follow proper safety protocols, minimizing the risk of accidents or injuries during the welding process.
Source:
conclusion:
mastering the art of welding metal for construction is a valuable skill that can open doors to a rewarding and fulfilling career. Through careful practice, dedication, and a commitment to safety, welders can contribute to the creation of structures that stand the test of time.
As technology continues to advance and new materials are introduced, the need for skilled welders will only increase, making this profession a promising choice for those seeking long-term job security.
Furthermore, the importance of proper training and continuous learning cannot be overstated. By staying up-to-date with the latest welding techniques and equipment, welders can enhance their skills and stay competitive in a rapidly evolving industry.
Whether it is joining two pieces of metal or repairing structural components, the ability to weld with precision and efficiency is an essential aspect of construction. Aspiring welders should embrace the challenges that come with this craft, knowing that their work contributes to the infrastructure of our society and leaves a lasting impact for generations to come.