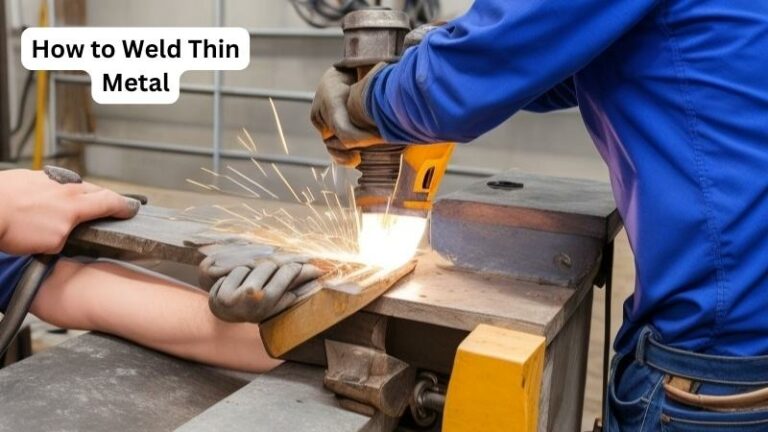
How To Weld Metal Outdoors
Today we discuss How To Weld Metal Outdoors. Unlike indoor welding, which provides a controlled environment with minimal external factors, outdoor welding presents its own unique set of challenges. However, with the right knowledge and preparation, you can overcome these obstacles and successfully weld metal in various outdoor settings.
We will explore the importance of selecting the right location, understanding the impact of weather conditions, and how to adapt your welding technique to account for these external factors. By the end of this guide, you’ll be equipped with the skills and confidence to tackle outdoor welding projects with ease, ensuring professional-quality results every time. So, let’s dive in and discover the secrets to mastering the art of welding metal outdoors!
How to Weld Metal Outdoors:
- Choose a well-ventilated area and wear appropriate safety gear.
- Prepare the metal surfaces by cleaning and removing any rust or paint.
- Set up your welding machine and connect the necessary cables.
- Adjust the welding settings based on the thickness of the metal.
- Position the metal pieces to be welded and secure them in place.
- Start the welding process by striking an arc and moving the electrode along the joint.
- Monitor the weld pool and maintain a steady speed and distance.
- Allow the weld to cool and inspect for any defects.
- Clean up the work area and store your equipment properly.

How To Weld Metal Outdoors:
Preparing Your Work Area:
Before you start welding outdoors, it is important to properly prepare your work area to ensure safety and efficiency. Firstly, select a well-ventilated area that is away from flammable materials. Make sure there is enough space to move around and that the ground is stable and level. Clear any debris or obstacles from the area to prevent accidents.
Next, set up a welding screen or curtain to protect yourself and others from sparks and UV radiation. This will also help to contain the welding fumes. If you are working in a windy location, consider using windbreaks to shield your work area from gusts of wind that can affect the quality of your welds.
Gathering the Necessary Equipment:
Once your work area is prepared, gather all the necessary equipment and materials for the welding process. Firstly, you will need a welding machine that is suitable for outdoor use. Ensure that it is in good working condition and that you have the appropriate power source available.
In addition to the welding machine, you will need welding electrodes or filler wire, depending on the type of welding you will be doing. Select the appropriate electrodes or wire for the metal you will be welding. Don’t forget to wear proper personal protective equipment (PPE) such as welding gloves, a welding helmet with a darkened lens, and flame-resistant clothing.
Furthermore, make sure you have a fire extinguisher nearby in case of emergencies. It is always better to be prepared for any unforeseen circumstances.
Setting Up Your Welding Equipment:
Once you have gathered all the necessary equipment, it’s time to set up your welding machine. Start by connecting it to the power source and ensuring that all the cables are properly secured. Adjust the welding parameters such as voltage and wire feed speed according to the thickness of the metal you will be welding.
Next, prepare the metal surfaces that need to be welded. Remove any rust, paint, or other contaminants using a wire brush or grinding wheel. Clean the surfaces with a degreaser to ensure good penetration and a strong weld. Clamp the metal pieces together in the desired position, ensuring they are properly aligned and tightly secured.
Before starting the welding process, double-check all your equipment and connections to ensure everything is in proper working order. Safety should always be your top priority.
Welding the Metal Outdoors:
Now that everything is set up, it’s time to start welding. Position yourself in a comfortable stance, ensuring that you have a clear line of sight to the welding area. Place your welding helmet on and adjust it to protect your eyes from the bright arcs.
Start the welding process by striking an arc between the welding electrode or wire and the metal surface. Move the electrode or wire in a controlled manner along the joint, maintaining a consistent arc length and speed. Pay attention to the welding puddle and make sure it is properly penetrating the metal.
Continue welding until you have completed the desired weld. Take breaks when needed to prevent overheating of the welding machine or yourself. Remember to keep your movements steady and avoid sudden jerks or excessive speed.
After completing the weld, inspect it for any defects or inconsistencies. If necessary, clean the weld area and remove any spatter or slag. Allow the weld to cool down before handling it.
Cleaning Up:
Once you have finished welding, it’s time to clean up your work area. Turn off the welding machine and disconnect it from the power source. Store all the equipment and materials in their designated places.
Dispose of any waste materials such as electrode stubs or empty wire spools responsibly. Clean any debris or welding slag from the work area, ensuring that it is safe and tidy for future use. Properly store your personal protective equipment to keep them in good condition.
Faqs for How To Weld Metal Outdoors:
When welding metal outdoors, it’s important to prioritize safety. Here are some precautions you should take:
First, make sure you have proper ventilation to avoid inhaling toxic fumes. Welding produces gases and smoke that can be harmful to your health. Working in an open area or using fans and exhaust systems can help with ventilation.
Second, wear appropriate protective gear. This includes a welding helmet with a shaded lens to protect your eyes from the intense light, flame-resistant clothing to shield your body from sparks and heat, and gloves to protect your hands from burns and cuts.
When welding metal outdoors, a portable and versatile welding machine is ideal. Look for a machine that can handle different types of welding processes, such as stick, MIG, or TIG welding. It should also have a high-duty cycle, allowing you to work continuously without overheating.
Additionally, consider the power source of the welding machine. Gasoline-powered or diesel-powered machines are more suitable for outdoor use as they provide greater mobility without the need for a direct power source.
However, if you have access to electricity, an electric welding machine can also be used outdoors with the right extension cords and safety precautions.
Welding outdoors can be challenging due to wind interference. Here are a few ways to protect your weld from the effects of wind:
First, position yourself and your welding machine in a way that minimizes the exposure to wind. If possible, create a windbreak using materials like tarps or plywood to block the wind from directly hitting your work area.
Second, adjust your welding technique to compensate for the wind. Increase your travel speed and adjust the angle of the welding torch to maintain a stable arc. You can also use a welding curtain or welding screen to create a barrier against the wind.
When welding outdoors, it’s important to choose the right type of electrode for the job. Here are some electrodes suitable for outdoor welding:
1. E6010: This is a cellulose-based electrode that provides deep penetration and is ideal for welding in windy conditions. It has a thin coating that helps stabilize the arc and reduces the effects of wind interference.
2. E7018: This is a low-hydrogen electrode that produces strong and clean welds. It is suitable for outdoor welding as it has good resistance to moisture and can be used in various weather conditions.
Outdoor welded metal is prone to rust and corrosion due to exposure to moisture and other environmental elements. Here are some preventive measures:
1. Clean and prep the metal properly before welding. Remove any rust, paint, or contaminants from the surface using a wire brush or grinder. Applying a primer or anti-corrosion coating before welding can also help protect the metal.
2. Use corrosion-resistant filler materials. Choose electrodes or welding wires that are specifically designed to resist corrosion, such as stainless steel or aluminum alloys.
3. Apply a protective coating after welding. Once the weld is complete, consider applying a protective layer such as paint, powder coating, or a corrosion-resistant spray to further shield the metal from moisture and other corrosive agents.

Source: wileymetal.com
Conclusion:
Welding metal outdoors can be a rewarding experience if done safely and correctly. By following the steps outlined in this article, you can ensure that your outdoor welding projects are successful. Remember to always prioritize safety and take necessary precautions to protect yourself and others. With practice and experience, you can become proficient in welding metal outdoors.