How To Weld Metal For Hobbyists
Today we discuss How To Weld Metal For Hobbyists. Welding is a versatile and practical skill that allows you to join pieces of metal together, creating sturdy and durable structures. Whether you want to build custom furniture, repair metal objects, or simply explore the possibilities of this craft, learning how to weld will open up a world of creative opportunities.
But where do you begin? Don’t worry, we’ve got you covered. In the following paragraphs, we will explore the fundamental techniques, equipment, and safety measures you need to know to successfully weld metal as a hobbyist. So, grab your welding mask, and let’s dive into the exciting world of metal welding!
How to Weld Metal for Hobbyists:
- Prepare your workspace by ensuring proper ventilation and gathering necessary safety equipment.
- Choose the appropriate welding method for your project, such as MIG or TIG welding.
- Clean the metal surfaces to be welded using a wire brush to remove any debris or rust.
- Secure the metal pieces in place using clamps or a vice grip.
- Set up your welding machine according to the manufacturer’s instructions.
- Start welding by striking an arc or feeding the filler material into the joint.
- Maintain a steady hand and move in a controlled manner along the joint to create a strong weld.
- Allow the welded metal to cool down before handling or further processing.

How To Weld Metal For Hobbyists:
Step 1: Gather the necessary equipment
Before you can start welding, it’s crucial to have the right tools and safety gear. Here’s a list of the essential equipment you’ll need:
- Welding machine: Choose a machine suitable for your project, such as a stick welder, MIG welder, or TIG welder.
- Welding helmet: Protect your eyes and face from sparks and UV rays with a quality welding helmet.
- Welding gloves: Invest in a pair of heavy-duty gloves that provide both heat and electrical insulation.
- Protective clothing: Wear flame-resistant clothing, such as a welding jacket and pants, to shield your body from burns.
- Welding electrodes: Select the appropriate electrodes based on the type of metal you’re welding and the welding machine you’re using.
- Clamps and magnets: These tools help hold the metal pieces together securely during the welding process.
Once you have gathered all the necessary equipment, ensure that you have a well-ventilated workspace and a fire extinguisher nearby for added safety. Now you’re ready to move on to the next step.
Step 2: Prepare the metal surfaces
Proper preparation of the metal surfaces is vital to ensure a strong and clean weld. Follow these steps to prepare your metal pieces:
- Clean the metal: Remove any rust, paint, or dirt from the surfaces that will be welded using a wire brush or sandpaper.
- Bevel the edges: If you’re welding thick metal, consider beveling the edges to create a V-shaped groove. This allows for better penetration and stronger welds.
- Secure the pieces: Use clamps or magnets to hold the metal pieces together firmly. This ensures they stay in place during welding.
- Check for fit-up: Verify that the pieces are aligned correctly and that there are no gaps between them. Proper fit-up is crucial for a successful weld.
- Remove contaminants: Before starting the welding process, make sure there are no oils, grease, or other contaminants on the metal surfaces. Use a degreaser if necessary.
By taking the time to properly prepare the metal surfaces, you’ll enhance the quality and durability of your welds. With the metal ready, it’s time to learn about the welding technique itself, which we’ll cover in the next section.
Step 3: Master the welding technique
Now that you have the equipment and prepared metal surfaces, it’s time to start welding. Follow these steps to master the welding technique:
- Set up your welding machine: Refer to the manufacturer’s instructions to set the appropriate voltage, amperage, and wire speed settings on your welding machine.
- Position yourself: Stand or sit in a comfortable position that allows you to have good visibility of the welding area.
- Hold the torch correctly: Grip the welding torch with one hand and position it at a slight angle to the metal surface.
- Start the arc: Depending on the welding process, either strike an arc by tapping the electrode against the metal or initiate the arc by pressing the trigger on your MIG or TIG torch.
- Control the motion: Move the torch in a steady and controlled manner along the joint, maintaining a consistent distance between the torch and the metal.
- Fill the joint: Ensure that the electrode or filler wire melts into the joint, creating a strong bond between the metal pieces.
- Monitor the weld pool: Keep an eye on the molten metal pool and adjust your speed and technique accordingly to achieve the desired weld bead.
- Continue welding: Repeat the welding process along the entire length of the joint until it is fully welded.
Remember to take breaks as needed, allowing the metal to cool down to prevent overheating. With practice, you’ll improve your welding skills and produce high-quality welds that meet your expectations.
Step 4: Post-welding tasks
After completing the welding process, there are a few essential post-welding tasks to ensure the longevity and appearance of your welds:
- Clean the weld: Use a wire brush or grinder to remove any slag or spatter from the weld bead, revealing a clean and smooth surface.
- Inspect the weld: Examine the weld for any defects, such as cracks or incomplete fusion. If necessary, perform additional welds to rectify any issues.
- Apply protective coatings: Depending on the metal and its intended use, consider applying protective coatings, such as paint or anti-corrosion treatments, to enhance durability.
By following these post-welding tasks, you’ll ensure that your welds not only look professional but also possess the necessary strength and integrity.
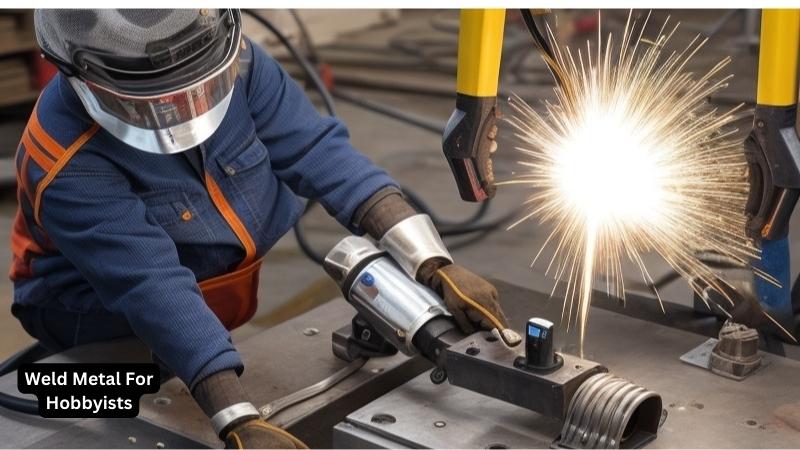
Faqs for Weld Metal For Hobbyists:
Welding is a process of joining two or more pieces of metal together using heat and pressure. It is commonly used in various industries, including construction, automotive, and fabrication. Welding allows for the creation of strong and durable connections between metal parts.
To weld metal, a welder uses a welding machine that generates an electric arc or flame to heat the metal surfaces. The intense heat causes the metal to melt, and when it solidifies, it forms a bond, creating a welded joint.
Welding involves working with high temperatures and potentially hazardous materials. Therefore, it is crucial to prioritize safety when engaging in welding activities.
Some key safety precautions to follow include wearing protective gear such as welding helmets, gloves, and clothing made of flame-resistant materials.
Ensure proper ventilation in the workspace to prevent the inhalation of fumes and gases. It is also important to have a fire extinguisher nearby and to be knowledgeable about its use.
There are several welding techniques available, each suited for different applications and metals. The most common types of welding techniques include:
– MIG (Metal Inert Gas) welding: Uses a consumable wire electrode and an inert gas to protect the welding area from atmospheric contamination.
– TIG (Tungsten Inert Gas) welding: Uses a non-consumable tungsten electrode and an inert gas to create the weld.
– Stick welding: Involves using a flux-coated electrode and an electric current to create the weld.
– Spot welding: Uses two electrodes to apply pressure and heat to join metal sheets together.
– Flux-cored arc welding: Similar to MIG welding but uses a tubular wire filled with flux.
To get started with welding as a hobbyist, you will need several essential pieces of equipment:
– Welding machine: Choose a machine suitable for your intended welding techniques, such as a MIG or TIG welder.
– Welding helmet: Protects your eyes and face from the intense light and sparks generated during welding.
– Welding gloves: Made of flame-resistant materials to shield your hands from heat and sparks.
– Welding apron or jacket: Provides additional protection for your body from sparks and hot metal.
– Welding clamps: Used to hold the metal pieces in place during welding.
– Welding electrodes or wire: Consumable materials that are specific to the welding technique you choose.
When starting out with welding, it is common to make mistakes. Here are some common welding mistakes to avoid:
– Poor preparation: Ensure that the metal surfaces are clean and free of contaminants before welding.
– Incorrect settings: Use the appropriate settings for your welding machine to achieve the desired weld quality.
– Lack of practice: Practice is crucial to improve your welding skills and achieve better results.
– Inadequate safety precautions: Always prioritize safety and follow the necessary safety measures to protect yourself and others.
– Ignoring proper ventilation: Welding produces fumes and gases that can be hazardous if inhaled, so ensure proper ventilation in your workspace.
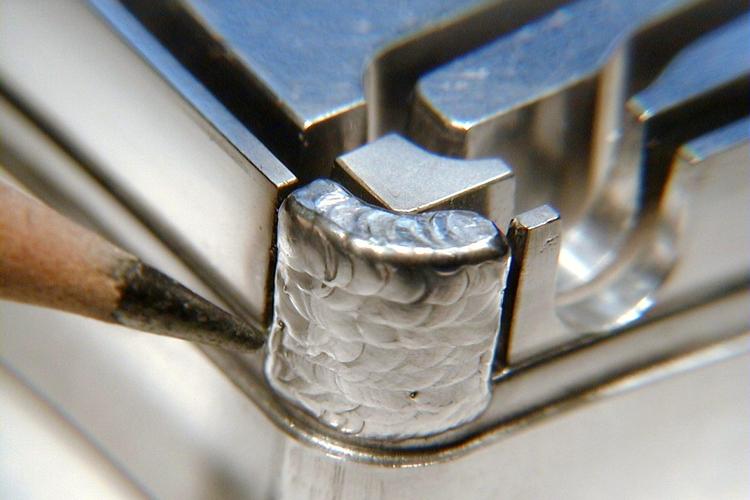
Source: thefabricator.com
conclusion:
mastering the art of welding metal for hobbyists is an exciting and fulfilling endeavor. With proper knowledge and practice, anyone can acquire the skills necessary to create stunning and functional metalwork. Remember to always prioritize safety by wearing protective gear and following proper welding techniques.
Furthermore, the possibilities for creativity and self-expression are endless when it comes to welding. Whether you choose to construct sculptures, furniture, or decorative pieces, the satisfaction of seeing your ideas take shape through the fusion of metal is unparalleled. So, embrace the challenges, hone your skills, and let your imagination run wild as you embark on this captivating journey into the world of welding. Happy welding!
