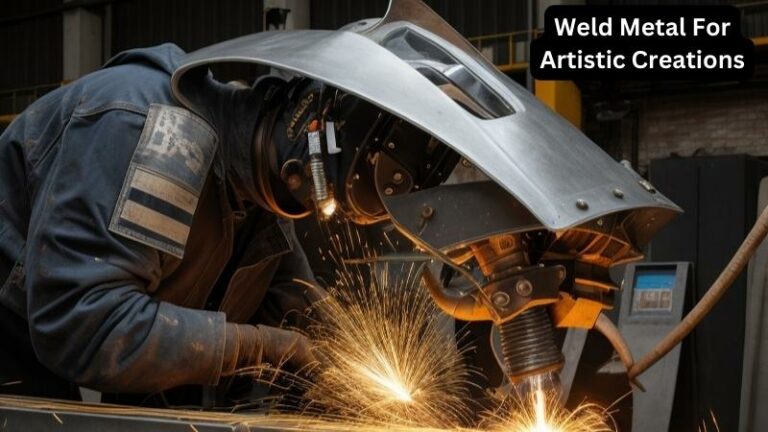
How To Weld Metal Indoors
Today we discuss How To Weld Metal Indoors. Whether you’re a seasoned DIY enthusiast or just starting out, this comprehensive guide will equip you with the knowledge and skills needed to tackle your indoor welding projects with confidence. From understanding the necessary safety precautions to selecting the right equipment and techniques, we’ll walk you through the entire process step by step. So, grab your welding helmet and get ready to dive into the fascinating world of indoor welding.
Welding metal indoors presents a unique set of challenges and considerations that differ from outdoor welding. Limited space, ventilation concerns, and potential hazards require a different approach and careful planning.
But fear not! In this guide, we will demystify the process, providing you with everything you need to know to weld metal safely and efficiently within the confines of your own indoor workshop. Whether you’re looking to repair household items, create custom metal art, or pursue a career in welding, this guide will be your go-to resource for mastering the art of indoor welding. So, let’s get started and unlock the endless possibilities that await you in the world of indoor welding.
How to Weld Metal Indoors:
- Ensure proper ventilation by opening windows or using exhaust fans.
- Choose a suitable welding method, such as MIG or TIG, based on the materials and project requirements.
- Prepare the work area by clearing any flammable materials and placing a fire-resistant mat or welding blanket underneath.
- Put on protective gear, including welding gloves, helmets, and clothing.
- Set up the welding machine according to the manufacturer’s instructions.
- Secure the metal pieces to be welded using clamps or a vise.
- Position the welding torch or electrode at the starting point and initiate the arc.
- Move the torch or electrode steadily along the joint, ensuring proper penetration and fusion.
- Allow the welded metal to cool down before handling it.
- Inspect the weld for any defects and make necessary adjustments if needed.
How to Weld Metal Indoors: A Step-by-Step Guide
Welding metal indoors can be a challenging task, but with the right equipment and techniques, it can be done safely and effectively. In this guide, we will walk you through the step-by-step process of welding metal indoors, ensuring that you have all the information you need to successfully complete your project.
1. Prepare Your Workspace
Before you begin welding, it is crucial to prepare your workspace properly. Start by clearing the area of any flammable materials or objects that could potentially ignite during the welding process. It is also essential to ensure that your workspace is well-ventilated to avoid any harmful fumes or gases. Open windows or use fans to improve air circulation.
Next, set up a welding table or workbench that provides a stable and secure surface for your project. Make sure the table is clean and free of any debris that could interfere with your welding process. Additionally, consider using a welding curtain or welding screen to create a designated area for welding and protect other parts of your workspace from sparks and heat.
2. Choose the Right Welding Equipment
When welding metal indoors, it is crucial to choose the right equipment for the job. Select a welding machine that is suitable for indoor use and matches the type of metal you will be welding. Common options include MIG (Metal Inert Gas) and TIG (Tungsten Inert Gas) welders.
Additionally, ensure that you have the necessary safety gear. This should include a welding helmet, welding gloves, and flame-resistant clothing. Safety should always be a top priority when welding, so make sure you are adequately protected.
3. Prepare the Metal
Properly preparing the metal before welding is essential for a successful outcome. Start by cleaning the metal surface to remove any dirt, rust, or paint. Use a wire brush or sandpaper to achieve a clean and smooth surface.
Next, ensure that the metal pieces are properly aligned and secured. Use clamps or magnets to hold the metal in place, ensuring that it does not move during the welding process. This will help you achieve accurate and precise welds.
4. Set Up Your Welding Machine
Before you begin welding, it is crucial to set up your welding machine correctly. Refer to the manufacturer’s instructions to determine the optimal settings for the type and thickness of metal you are welding. Adjust the voltage, amperage, and wire speed accordingly to ensure proper weld penetration and quality.
Additionally, make sure you have the appropriate welding wire and shielding gas for your project. Consult the welding wire chart to select the right size and type of wire for the metal you are working with. Similarly, choose the appropriate shielding gas to protect the weld from contamination and oxidation.
5. Start Welding
With everything properly set up, you are ready to start welding. Position the welding gun or torch at a comfortable angle and distance from the metal surface. Begin by striking an arc, ensuring that the electrode or filler wire contacts the metal.
Maintain a steady hand and move the welding gun or torch in a controlled manner along the joint, creating a continuous weld bead. Take your time and ensure that the weld is even and consistent. Pause periodically to allow the metal to cool and prevent overheating.
6. Inspect and Clean the Weld
Once you have completed the welding process, it is crucial to inspect and clean the weld. Examine the weld for any defects, such as cracks, porosity, or lack of fusion. Use a wire brush or grinder to remove any excess slag or spatter.
Inspect the weld visually and, if necessary, perform non-destructive testing methods like ultrasonic or dye penetrant testing to ensure the integrity of the weld. If any defects are found, re-weld the affected areas to achieve a satisfactory result.
7. Post-Welding Considerations
After completing the welding process, it is important to consider some post-welding steps. Allow the welded metal to cool naturally before handling it. Avoid touching the weld directly, as it may still be hot.
Furthermore, properly store your welding equipment and clean your workspace. Remove any leftover debris or welding consumables and store your equipment in a dry and secure location. Regularly maintain your welding machine to ensure it remains in good working condition for future projects.
By following these step-by-step instructions and taking the necessary precautions, you can successfully weld metal indoors. Remember to prioritize safety at all times and consult professionals or experts if you have any doubts or questions.

Faqs for How To Weld Metal Indoors:
No, it is not recommended to weld metal indoors without proper ventilation. Welding produces fumes and gases that can be harmful if inhaled. These fumes can contain hazardous substances such as manganese, chromium, and nickel, which can have serious health effects.
It is important to have adequate ventilation in the welding area to ensure the removal of these fumes. This can be achieved by using exhaust fans, ventilation systems, or welding in a well-ventilated area such as a welding booth.
Additionally, it is crucial to wear appropriate personal protective equipment (PPE) such as a welding helmet, gloves, and a respirator to protect yourself from the fumes and gases generated during the welding process.
MIG (Metal Inert Gas) welding is one of the most suitable welding processes for indoor welding. MIG welding uses a wire electrode that is continuously fed through a torch, along with a shielding gas, to create the weld.
This process is relatively clean and produces minimal fumes compared to other welding processes. It is also versatile and can be used to weld a wide range of metals, including steel, stainless steel, and aluminum.
However, it is still important to ensure proper ventilation and take necessary safety precautions when performing MIG welding indoors. Adequate shielding gas coverage and a well-maintained welding machine are essential for achieving high-quality welds indoors.
Gas welding processes, such as oxy-acetylene welding, are not typically recommended for indoor welding. These processes involve the use of flammable gases, such as acetylene, which can pose a significant safety risk if not handled properly.
Additionally, gas welding tends to produce more fumes and smoke compared to other welding processes, which can be challenging to control in an indoor environment.
If you need to weld indoors and prefer a gas-based process, it is better to consider alternative options such as propane-based welding processes like propane torch welding or propane-powered soldering irons. These processes are generally safer for indoor use and produce fewer fumes and smoke.
When welding indoors, it is important to take measures to protect your workspace and surrounding areas. Here are some steps you can take:
a) Clear the area: Remove any flammable materials, such as paper, fabrics, or solvents, from the welding area. Clear the workspace to create a safe distance between the weld and any combustible materials.
b) Use welding curtains or screens: Install welding curtains or screens around the welding area to contain sparks, spatter, and UV light. These curtains or screens should be made from flame-resistant material and be sufficient to cover the entire welding operation.
c) Fire extinguisher: Have a fire extinguisher readily available in case of any welding-related fires. Ensure that you know how to operate the fire extinguisher effectively.
When welding indoors, it is crucial to follow proper safety precautions to minimize hazards. Here are some important safety measures:
a) Ventilation: Ensure adequate ventilation in the welding area to remove fumes and gases. This can be achieved through the use of exhaust fans, ventilation systems, or welding in a well-ventilated area.
b) Personal protective equipment (PPE): Wear appropriate PPE, including a welding helmet with a proper shade, safety glasses, gloves, and a welding jacket or apron. Additionally, use a respirator to protect yourself from welding fumes and gases.
c) Fire safety: Keep a fire extinguisher nearby and be aware of the location of emergency exits. Avoid welding near flammable materials and have a fire watch person present during and after welding activities.
d) Electrical safety: Ensure that electrical connections are properly insulated and grounded. Avoid using damaged or frayed welding cables.
Source: ytimg.com
Conclusion:
learning how to weld metal indoors opens up a world of possibilities for both professionals and hobbyists alike. With the right equipment, knowledge, and safety precautions, one can easily create and repair a wide range of metal projects without the need to rely on external services.
By understanding the different welding techniques, such as MIG, TIG, or stick welding, individuals can confidently take on various projects, from constructing furniture to automotive repairs, all within the comfort of their own indoor workspace.
However, it is crucial to emphasize the importance of safety when welding indoors. Adequate ventilation and proper protective gear, such as welding helmets and gloves, are essential to ensure personal safety and prevent any potential hazards.
Additionally, being aware of fire safety measures and having a fire extinguisher nearby is crucial in case of any accidents. By prioritizing safety and adhering to proper welding practices, individuals can indulge in the art of welding indoors, expanding their skill set and unleashing their creativity while maintaining a secure environment.